Hello everyone!
Today is the last day of my Colossal Easter/spring Nail Art Week! It's been fun.
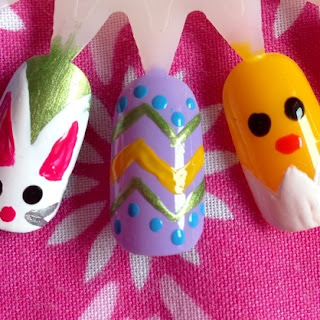
Today's look is the Easter Egg design. It's very easy and totally customisable. Here it is.
Today is the last day of my Colossal Easter/spring Nail Art Week! It's been fun.
Today's look is the Easter Egg design. It's very easy and totally customisable. Here it is.
You Will Need:
Dip the thin paintbrush into the green and create two chevron (diagonal) lines.
Clean off the paintbrush and dip it into the yellow and create another chevron stripe.
Dip the dotting tool into the blue and create a line of dots along the green chevrons.
As usual leave lots of time for drying so that if you want to topcoat it, it won't smear.
It's nice and festive isn't it! Well that's it for the Colossal Easter Nail Art Week, I've enjoyed it and I hope you have too. If you try out these designs use the hashtag #easterblogweek and I'll check them out! Maybe see you Sunday? I'm not sure yet, otherwise I'll see you when I see you.
Abi xxx


No comments
Post a Comment