Hello everyone!
We're nearly at the end of my Easter/spring nail art week! Today's design is the Bunny one. He's really cute and quite easy to do. Let's get started.
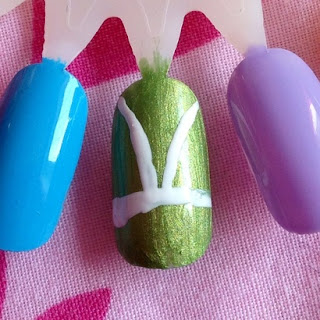
Starting with a green base, use a thin paintbrush dipped in white to mark out the shape of the Bunny's head and ears.
We're nearly at the end of my Easter/spring nail art week! Today's design is the Bunny one. He's really cute and quite easy to do. Let's get started.
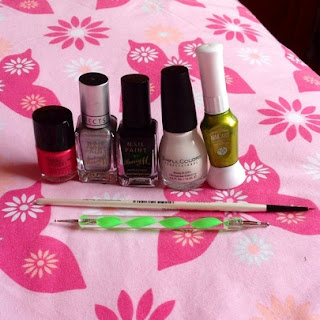
You Will Need:
Starting with a green base, use a thin paintbrush dipped in white to mark out the shape of the Bunny's head and ears.
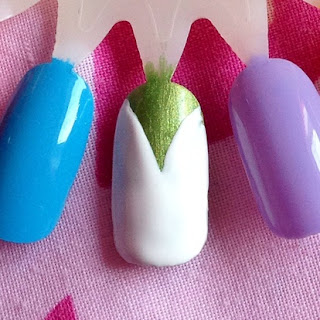
Then using a dotting tool or the brush that comes with the white, fill it in.
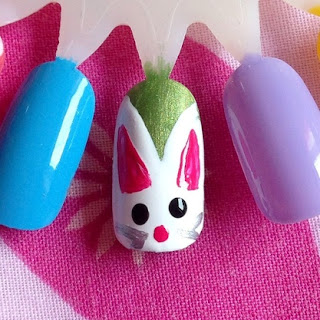
Now using a thin paintbrush dipped in pink, mark out the inner ears and fill them in with a dotting tool or the thin paintbrush.
Now, using a dotting tool or bobby pin dipped in pink, make a dot in the middle to create the nose.
Clean off the dotting tool, dip it into the black and create two dots either side of the nose and slightly higher for the eyes.
Using the thin paintbrush dipped in silver, create two arrow shapes (> and <) either side of the nose for the whiskers.
If you want to top coat him, give him a while to dry because black smears terribly.
There you have your little Bunny! Isn't he sweet?
Tomorrow is the last day and will be the Easter Egg design, so make sure you pop back for that!
See you then,
Abi xxx
Tomorrow is the last day and will be the Easter Egg design, so make sure you pop back for that!
See you then,
Abi xxx


No comments
Post a Comment